A date night plan
Sea-glass artwork: a little coastal colour, collected thoughtfully
Plan a permitted beach search, keep collecting modest and make a small framed composition, with a photograph-based alternative when materials should stay on the shore.
Is this the plan for you?
Time to allow
Allow around 4 hours across travel, a modest beach visit and making. Leave additional drying time for any adhesive according to its instructions; the frame need not be hung the same day.
Budget notes
Keep a small materials budget with an existing frame, card and suitable craft adhesive. Include travel, and avoid buying extra beach pieces simply to make the collection look more impressive.
These are planning suggestions, not live prices or bookings. The shorter and longer versions give you room to adapt the activity to your day.
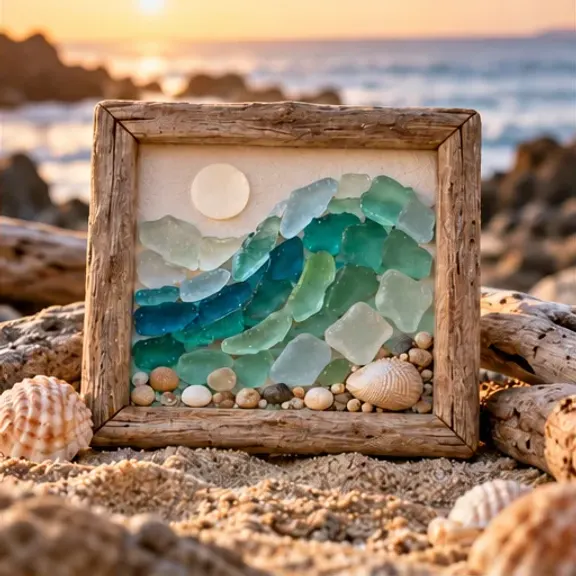
Illustrative artwork; not a photograph of a tested outing.
Sea glass can offer a lovely starting point for a small shared artwork: muted colours, interesting shapes and a place you will remember visiting. Begin with the beach’s rules and conditions, then let what you actually find shape the design. There is no requirement to return with a full bag or a rare colour.
Some beaches or protected places do not allow collecting, and finding nothing suitable is entirely possible. Photographing colours and textures, then recreating them with paper at home, makes a thoughtful alternative. Your finished piece can remember the walk without needing to take part of the beach away.
Your supply checklist
Tick off what you have gathered, or print a fresh checklist. Ticks are for this page only.
☐
Current beach rules, tide and weather information
☐
A small container only if collecting is permitted
☐
Suitable footwear and protection for handling found material
☐
A frame, sturdy backing card and pencil
☐
Suitable craft adhesive and paper alternatives for the design
Make it happen
1. Check whether this beach welcomes collecting
Consult the land manager’s current rules, including any protected-area restrictions, and check weather, tides and safe access. If you cannot confirm permission, plan to photograph rather than collect. Choose an easy stretch with a clear exit and stay away from unsafe edges or water. A short, thoughtful search is more enjoyable than trying to fill an ambitious container.
2. Look slowly and leave doubtful pieces alone
Walk on suitable ground and notice colour and texture without disturbing habitats or digging into protected areas. Where collecting is permitted, take only a few suitable pieces and leave sharp, contaminated or uncertain material untouched. Do not search where waves or tides make access unsafe. Photographs, a colour note or a quick sketch can be the entire collection if that suits the place.
3. Turn the walk into a tiny design brief
Back home, follow sensible cleaning and handling precautions for suitable found items, then let them dry. Look at what you have and choose a simple composition: abstract waves, a small scene or a colour row. Use paper pieces to fill gaps rather than demanding a specific shape from the beach. Agree where the finished artwork might live before choosing its size.
4. Arrange before committing anything to glue
Lay the pieces on sturdy backing and try a few arrangements together. Photograph the favourite layout so you can rebuild it easily. Check that the frame has suitable depth and support, then use an adhesive intended for the materials, following its instructions and ventilation requirements. Work at a protected table and keep hands clear of sharp edges or unsuitable pieces.
5. Name the piece and let it finish properly
Add a small caption with the place and date, including a line about what you noticed together. Let the adhesive dry or cure fully before framing or moving the work. Check everything is secure and choose an appropriate display position for its weight and materials. Put spare pieces away safely, or use your photographs as a record without collecting anything further.
Make it work for you
A leave-it-on-the-beach version
Take permitted photographs of colours and shapes, then cut matching pieces from paper or use safe craft materials already at home. Add the beach name as the artwork’s caption.
A seated coastal visit
Choose an accessible promenade or viewpoint and make a colour palette from what you can see. The artwork can respond to sea, sky and buildings without searching the shore.
Not many pieces found
Make a postcard-sized design around one or two suitable finds, or combine a photograph with drawn shapes. Empty space can be part of the composition.
Before you begin
Confirm collecting permission and follow local restrictions, tides and beach guidance. Leave sharp or suspicious material untouched, avoid habitat disturbance and follow craft adhesive instructions carefully.
RNLI beach safety →The thoughtful shore-to-frame sheet
Use this to keep the beach visit and making session connected.
1. Beach manager’s collecting rules and safe access checked:
2. Weather, tide and our latest return time:
3. Three colours or textures we noticed:
4. Our permitted finds or photograph references:
5. Small artwork idea and intended display place:
6. Frame depth, backing and adhesive instructions checked:
7. Caption: place, date and a detail we want to remember:
These prompts are included when you print the plan and checklist.
A small picture can remember a whole stretch of coast, including everything you thoughtfully left there.
How did your date go?
Was a step unclear, or did you find a useful shortcut? Tell us the activity and what you would change.
Email feedback about this plan →Your email app opens so you can choose what to send. Please leave out private details, children’s names and photographs of other people.
Make choosing the date part of the date
Put a few possibilities you both like into a board and enjoy finding out which one wins. The sample game is an easy place to start.
A few more possibilities
A private boat cruise, with the practical questions asked ashore →A sandcastle competition with extremely ambitious planning permission →An at-home festival with two headliners and a very short walk to bed →Published by Daniel Jenkins · Guide text updated 28 October 2026
The activity lists were supplied and edited for Deal or Date. Guides and illustrative artwork use AI assistance. They are planning suggestions rather than accounts of personal trips or product tests. Venue prices, entry rules and accessibility need checking with the place you choose.
More dates. Brighter days.
No login. Just the two of you.
Deal or Date · Beta 0.1